

Looking for a dessert that’s as magical as it is delicious? Say hello to the Unicorn Cake—a whimsical, colorful masterpiece that’s guaranteed to brighten your day and wow your guests! Whether you’re celebrating a birthday, hosting a party, or simply craving a fun baking project, this cake is the ultimate crowd-pleaser. With its vibrant rainbow layers, dreamy buttercream frosting, and sparkling edible decorations, it’s not just a dessert—it’s an experience.
But here’s the best part: you don’t need to be a professional baker to create this showstopper. This recipe is designed to be approachable, fun, and perfect for bakers of all skill levels. Imagine slicing into a cake that’s as joyful to make as it is to eat! Ready to bring a little magic into your kitchen? Let’s get started!
Table of Contents
Key Benefits
Why should you make a Unicorn Cake? Let’s dive into the reasons this magical dessert deserves a spot in your baking repertoire:
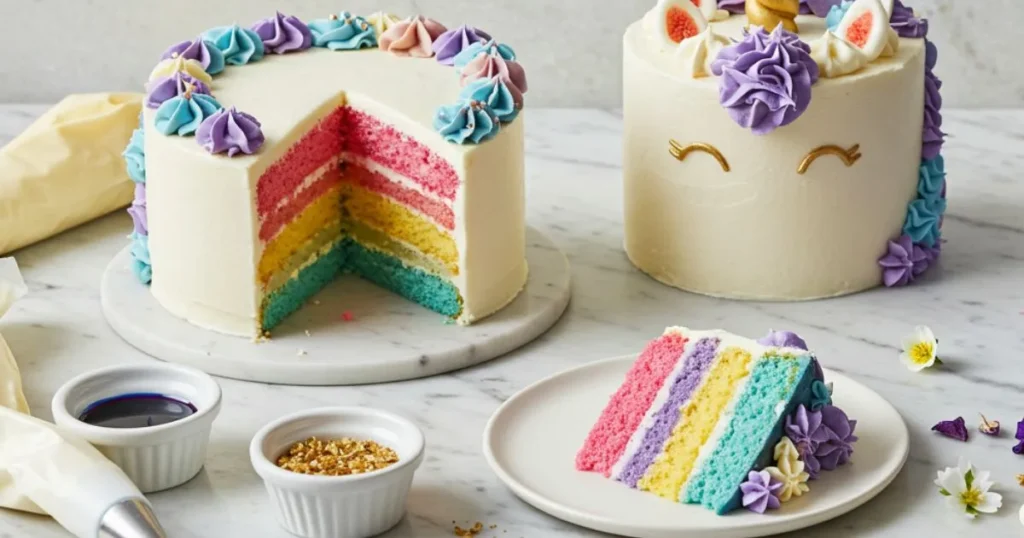
- Visually Stunning: This cake is a feast for the eyes! With its vibrant rainbow layers, shimmering frosting, and playful decorations, it’s guaranteed to be the star of any celebration. Perfect for birthdays, baby showers, or just because!
- Fun for All Ages: Whether you’re baking with kids, friends, or flying solo, this recipe is a joy to make. It’s a fantastic way to unleash your creativity and add a little whimsy to your day.
- Crowd-Pleasing Flavor: Beyond its looks, this cake is downright delicious. Moist vanilla layers paired with creamy buttercream frosting create a classic flavor combo that everyone loves.
- Instagram-Worthy: Let’s be honest—this cake is made for sharing (both in person and online). Snap a photo, and watch the likes roll in!
- Customizable: Don’t have rainbow food coloring? No problem! You can adapt the colors to match any theme or occasion. Plus, the recipe is flexible enough to accommodate dietary preferences like gluten-free or vegan options.
In short, the Unicorn Cake isn’t just a dessert—it’s a celebration in cake form. Ready to bring some magic to your kitchen? Let’s gather our ingredients and get started!
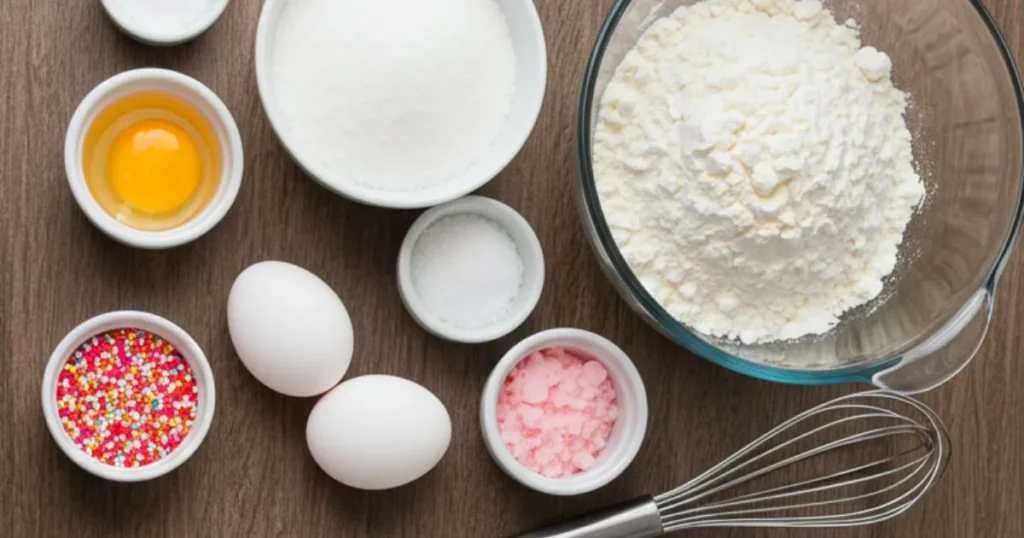
Ingredients
Before we dive into the magic of baking, let’s gather everything you’ll need to create your Unicorn Cake. Don’t worry—most of these ingredients are pantry staples, and the rest are easy to find at your local grocery store. Here’s what you’ll need:
For the Cake Layers:
- 2 ½ cups (315g) all-purpose flour
- 2 ½ tsp baking powder
- ½ tsp salt
- 1 cup (225g) unsalted butter, softened
- 2 cups (400g) granulated sugar
- 4 large eggs, room temperature
- 1 tbsp pure vanilla extract
- 1 cup (240ml) whole milk, room temperature
- Gel food coloring (pink, purple, blue, and yellow)
For the Buttercream Frosting:
- 1 ½ cups (340g) unsalted butter, softened
- 6 cups (750g) powdered sugar, sifted
- ¼ cup (60ml) heavy cream or milk
- 1 tbsp pure vanilla extract
- A pinch of salt
- Gel food coloring (pastel shades for a unicorn theme)
For Decorations:
- Edible glitter or luster dust
- Rainbow sprinkles
- Fondant (for unicorn horns and ears, optional)
- Gold or silver dragees (optional)
Pro Tips for Ingredient Success:
- Room Temperature Ingredients: Ensure your butter, eggs, and milk are at room temperature for a smoother batter and fluffier cake.
- Gel Food Coloring: Gel-based colors are more vibrant and won’t thin out your batter or frosting like liquid food coloring.
- Sifted Powdered Sugar: Sifting prevents lumps in your buttercream, giving it a silky-smooth texture.
With these ingredients ready, you’re all set to create a cake that’s as delightful to make as it is to eat. Let’s move on to the fun part—baking your Unicorn Cake!
How to make unicorn Cake
Ready to bring your Unicorn Cake to life? Follow these step-by-step instructions to create a magical dessert that’s as fun to make as it is to eat. Let’s get started!
Step 1: Prepare the Cake Batter
- Preheat the Oven: Set your oven to 350°F (175°C) and grease three 6-inch round cake pans. Line them with parchment paper for easy removal.
- Mix Dry Ingredients: In a medium bowl, whisk together the flour, baking powder, and salt. Set aside.
- Cream Butter and Sugar: In a large mixing bowl, beat the softened butter and sugar until light and fluffy (about 3-4 minutes).
- Add Eggs and Vanilla: Beat in the eggs, one at a time, followed by the vanilla extract.
- Combine Wet and Dry Ingredients: Gradually add the dry ingredients to the butter mixture, alternating with the milk. Mix until just combined—don’t overmix!
Step 2: Color the Batter
- Divide the Batter: Evenly divide the batter into four separate bowls.
- Add Food Coloring: Use gel food coloring to dye each portion a different color (e.g., pink, purple, blue, and yellow). Stir until the colors are vibrant and evenly distributed.
- Layer the Colors: Spoon the colored batter into the prepared pans, alternating colors to create a rainbow effect. Use a spatula to smooth the tops.
Step 3: Bake the Cake Layers
- Bake: Place the pans in the preheated oven and bake for 25-30 minutes, or until a toothpick inserted into the center comes out clean.
- Cool: Let the cakes cool in the pans for 10 minutes, then transfer them to a wire rack to cool completely.
Step 4: Make the Buttercream Frosting
- Beat the Butter: In a large mixing bowl, beat the softened butter until creamy (about 2-3 minutes).
- Add Sugar and Cream: Gradually add the sifted powdered sugar, followed by the heavy cream, vanilla extract, and a pinch of salt. Beat until smooth and fluffy.
- Color the Frosting: Divide the frosting into smaller bowls and tint each with pastel gel food coloring.
Step 5: Assemble and Decorate
- Layer the Cake: Place the first cake layer on a serving plate. Spread a thin layer of frosting on top, then repeat with the remaining layers.
- Crumb Coat: Apply a thin layer of frosting around the entire cake to seal in crumbs. Chill for 15-20 minutes.
- Frost and Decorate: Use the colored frosting to create a whimsical design. Swirl the colors together with a spatula or piping bag for a magical effect. Add edible glitter, sprinkles, and fondant decorations (like unicorn horns or ears) to complete the look.
Pro Tips for Success:
- Chill the Cake: If the cake layers are too soft, chill them in the fridge for 15-20 minutes before frosting. This makes them easier to handle.
- Piping Bag Magic: Use a piping bag with a star tip to create beautiful rosettes or swirls on the cake.
- Edible Decorations: Get creative with sprinkles, glitter, and fondant to make your cake truly unique.
And there you have it—a stunning Unicorn Cake that’s sure to impress! Slice into it to reveal the vibrant rainbow layers, and watch everyone’s faces light up with joy.
Pro Tips and Variations
Now that you’ve mastered the basics of making a Unicorn Cake, let’s take it up a notch with some expert tips and creative variations. Whether you’re looking to save time, accommodate dietary needs, or simply add your own twist, these ideas will help you customize your cake to perfection.
Pro Tips for Baking Success
- Even Layers: Use a kitchen scale to divide the batter evenly between pans. This ensures your cake layers bake uniformly.
- Smooth Frosting: For a flawless finish, dip your spatula in warm water, wipe it dry, and gently smooth the frosting.
- Chill Before Decorating: Pop the frosted cake in the fridge for 15-20 minutes before adding final decorations. This helps the frosting set and makes it easier to work with.
- Vibrant Colors: Gel food coloring works best for achieving bold, bright hues without altering the batter’s consistency.
Creative Variations
- Flavor Twists:
- Swap vanilla extract for almond or lemon extract to add a unique flavor profile.
- Add a layer of fruit jam or curd between the cake layers for a fruity surprise.
- Dietary Adaptations:
- Gluten-Free: Use a 1:1 gluten-free flour blend in place of all-purpose flour.
- Vegan: Substitute eggs with flax eggs, butter with vegan margarine, and milk with almond or oat milk.
- Color Themes:
- Match the cake colors to a specific theme, like pastels for a baby shower or bold hues for a birthday party.
- Go monochromatic with shades of one color for an elegant twist.
- Decorating Ideas:
- Use edible flowers or gold leaf for a sophisticated touch.
- Create a galaxy effect by blending dark blue and purple frosting with edible glitter.
Time-Saving Hacks
- Bake Ahead: Bake the cake layers a day in advance, wrap them tightly in plastic wrap, and store them at room temperature. Frost and decorate the next day.
- Store-Bought Help: Use high-quality store-bought frosting if you’re short on time. Just tint it with gel food coloring for a custom look.
Troubleshooting Common Issues
- Dry Cake: Overbaking can dry out your cake. Check for doneness a few minutes before the recommended time.
- Frosting Too Soft: If your buttercream is runny, chill it in the fridge for 10-15 minutes, then re-whip before using.
- Colors Too Pale: Add gel food coloring gradually until you achieve the desired vibrancy.
With these tips and variations, you can make your Unicorn Cake truly your own. Whether you’re baking for a special occasion or just because, these ideas will help you create a dessert that’s as unique as you are.
Serving Suggestions
Your Unicorn Cake is a masterpiece, and now it’s time to present it in a way that’s just as magical as the cake itself! Here are some creative and practical serving suggestions to make your dessert the star of the show.
Presentation Ideas
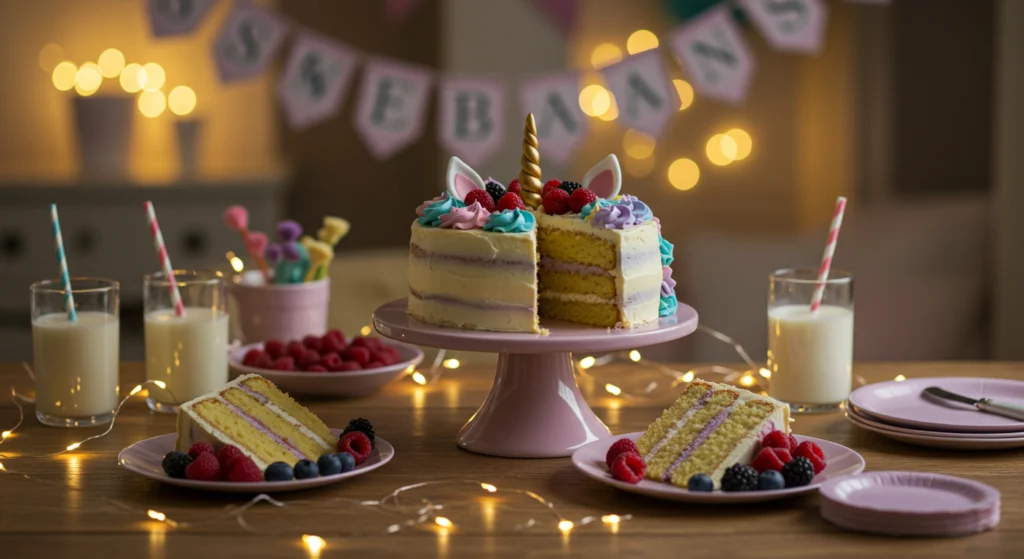
- Cake Stand Centerpiece: Place your cake on a decorative cake stand to elevate it (literally and figuratively) as the centerpiece of your dessert table.
- Themed Decor: Surround the cake with matching decorations like balloons, streamers, or fairy lights to create a cohesive party vibe.
- Slice Display: Cut a few slices ahead of time and arrange them on a platter to showcase the vibrant rainbow layers inside.
Pairing Suggestions
- Beverages:
- Serve with a glass of cold milk, a cup of coffee, or a fruity mocktail for a delightful pairing.
- For adults, a sparkling wine or champagne adds a touch of elegance.
- Side Treats:
- Offer a scoop of vanilla ice cream or whipped cream on the side for an extra indulgent treat.
- Pair with fresh berries or a fruit salad to balance the sweetness.
Serving Tips
- Clean Cuts: Use a sharp, warm knife to slice the cake. Wipe the blade clean between cuts for neat, picture-perfect slices.
- Portion Control: A little goes a long way with this rich dessert. Smaller slices are perfect for kids or for serving a larger crowd.
- Garnish: Add a sprinkle of edible glitter or a few fresh berries on each plate for a finishing touch.
Storing Leftovers
- Room Temperature: Store the cake in an airtight container at room temperature for up to 2 days.
- Refrigerator: For longer storage, keep it in the fridge for up to 5 days. Let it come to room temperature before serving for the best texture.
- Freezer: Wrap individual slices in plastic wrap and freeze for up to 2 months. Thaw in the fridge overnight before enjoying.
Pro Tip:
If you’re serving the cake outdoors or at a party, keep it covered until the last moment to protect it from heat, wind, or curious fingers!
Conclusion
Congratulations—you’ve just created a Unicorn Cake that’s as magical as it is delicious! Whether you’re a seasoned baker or a first-time cake decorator, this recipe is proof that a little creativity and a lot of fun can result in something truly extraordinary.
This cake isn’t just a dessert; it’s a celebration of joy, color, and imagination. It’s perfect for birthdays, holidays, or any day that needs a little extra sparkle. And the best part? You made it yourself, infusing every layer with love and care.
So, gather your friends and family, slice into those vibrant rainbow layers, and watch their faces light up with delight. Don’t forget to snap a photo of your masterpiece—it’s definitely Instagram-worthy!
Thank you for joining me on this whimsical baking adventure. I hope this Unicorn Cake brings as much happiness to your table as it does to mine. Happy baking, and may your days be as bright and colorful as this cake!
FAQs
Got questions about making your Unicorn Cake? Don’t worry—I’ve got you covered! Here are answers to some of the most common questions to help you bake with confidence and ease.
1. Can I make this cake ahead of time?
Absolutely! You can bake the cake layers up to 2 days in advance. Wrap them tightly in plastic wrap and store at room temperature. Frost and decorate the cake the day you plan to serve it for the freshest taste and texture.
2. How do I prevent my cake layers from doming?
To avoid domed tops, try these tips:
- Use cake strips (or DIY them with wet towels and aluminum foil) around the pans to ensure even baking.
- Gently tap the pans on the counter before baking to release air bubbles.
- Trim the tops with a serrated knife if they still dome slightly.
3. Can I use liquid food coloring instead of gel?
While you can use liquid food coloring, gel-based colors are highly recommended. They’re more concentrated, so you’ll need less to achieve vibrant hues without thinning out your batter or frosting.
4. How do I store leftover cake?
- Room Temperature: Store in an airtight container for up to 2 days.
- Refrigerator: Keep it in the fridge for up to 5 days. Let it come to room temperature before serving.
- Freezer: Wrap individual slices in plastic wrap and freeze for up to 2 months. Thaw in the fridge overnight.
5. Can I make this cake gluten-free or vegan?
Yes! Here’s how:
- Gluten-Free: Use a 1:1 gluten-free flour blend in place of all-purpose flour.
- Vegan: Substitute eggs with flax eggs, butter with vegan margarine, and milk with almond or oat milk.
6. My frosting is too runny. What should I do?
If your buttercream is too soft, chill it in the fridge for 10-15 minutes, then re-whip it. You can also add a bit more sifted powdered sugar to thicken it up.
7. How can I make the colors more vibrant?
- Use gel food coloring for bold, bright hues.
- Add the coloring gradually until you achieve the desired shade.
- For pastel colors, use less coloring and mix thoroughly.
8. Can I use a different frosting?
Of course! While buttercream is classic, you can try cream cheese frosting, whipped cream, or even a chocolate ganache for a different flavor profile.
9. How do I transport the cake safely?
- Use a cake carrier or a sturdy box to protect the cake during travel.
- Chill the cake in the fridge for at least 30 minutes before transporting to help the frosting set.
- Place non-slip mats or a damp towel under the cake stand to prevent sliding.
10. What if I don’t have fondant for decorations?
No problem! You can use:
- Edible glitter or sprinkles for a sparkly effect.
- Fresh flowers (make sure they’re food-safe).
- Piped buttercream designs like stars, swirls, or rosettes.
I hope these FAQs help you tackle any challenges and make your Unicorn Cake baking experience as smooth as possible. If you have more questions, feel free to ask—I’m here to help!